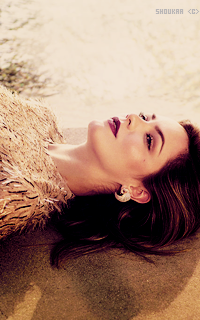
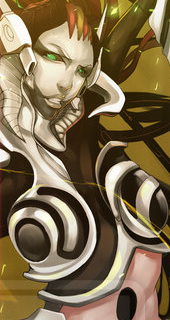
Un petit code pour gagner un peu de place dans le profil des messages souvent très long : cacher le profil ! Contrairement à d'autres codes où celui-ci est mis en spoiler, ici il est présent sous l'avatar du joueur et il faut survoler celui-ci pour voir les informations du profil.
Le résultat en images :
 =>
=> 
Pour faire ce tutoriel vous aurez besoin de :
- modifier le template viewtopic_body
- ajouter un peu de CSS dans votre Feuille CSS
- définir une taille fixe des avatars pour les membres, donc leur imposer une taille précise qui est dans mon exemple la plus répandue actuellement à savoir 200*320
▬ Commençons par bouger les choses dans notre template !
Allez dans Affichage > Templates > Général > viewtopic_body (affichage d'un sujet)
Repérez à la ligne 90 cette partie là :
- Code:
<td class="{postrow.displayed.ROW_CLASS}"{postrow.displayed.THANK_BGCOLOR} valign="top" width="150">
         <span class="name"><a name="{postrow.displayed.U_POST_ID}"></a><strong>{postrow.displayed.POSTER_NAME}</strong></span><br />
            <span class="postdetails poster-profile">
            {postrow.displayed.POSTER_RANK}<br />
            {postrow.displayed.RANK_IMAGE}{postrow.displayed.POSTER_AVATAR}<br /><br />
            <!-- BEGIN profile_field -->
            {postrow.displayed.profile_field.LABEL} {postrow.displayed.profile_field.CONTENT}{postrow.displayed.profile_field.SEPARATOR}
            <!-- END profile_field -->
            {postrow.displayed.POSTER_RPG}
         </span><br />
         <img src="http://2img.net/i/fa/empty.gif" alt="" style="width:150px;height:1px" />
      </td>
Indication : le "td" ouvrant une case de tableau, ceci correspond à toute la case de profil, à droite du message.
Remplacez ce morceau par ceci :
- Code:
<!--Début de la modification pour l'apparence de l'avatar avec effet masqué-->

<td class="{postrow.displayed.ROW_CLASS}"{postrow.displayed.THANK_BGCOLOR} valign="top" width="150">
<!--Code affichage dernier message posté-->  <a name="{postrow.displayed.U_POST_ID}"></a>

                  <span class="rang_mess">{postrow.displayed.RANK_IMAGE}</span>

                  <span class="avatar_mess"><span class="profil_mess"><!-- BEGIN profile_field -->
            {postrow.displayed.profile_field.LABEL} {postrow.displayed.profile_field.CONTENT}{postrow.displayed.profile_field.SEPARATOR}
            <!-- END profile_field -->
                    {postrow.displayed.POSTER_RPG}</span>
                    {postrow.displayed.POSTER_AVATAR}</span>

                  <span class="pseudo_mess">
<!--Tentative d'ajout du rang-->
{postrow.displayed.POSTER_RANK}<br />
<font size=3><b>{postrow.displayed.POSTER_NAME}</b></font></span>

      </td>


<!--fin de la modification pour l'apparence de l'avatar avec effet masqué-->
Constatez que je n'ai pas modifié la structure elle-même, j'ai laissé la case, seul le contenu est bougé.
N'oubliez pas de valider votre template !
▬ Allons ensuite ajouter le CSS
Allez dans Affichage > Couleurs > Feuille css et copiez ce code :
- Code:
.avatar_mess
{
  display: block;
  width: 200px;
  height: 320px;
  margin-left: -10px;
  margin-right: 10px;
  overflow: hidden;
  background: #272726;
  border: 5px solid #3e1d19;
  transform: rotate(-5deg);
  -moz-transform: rotate(-5deg);
  -o-transform: rotate(-5deg);
  -ms-transform: rotate(-5deg);
  -htm-transform: rotate(-5deg);
  -webkit-transform: rotate(-5deg);
  box-shadow: 0px 0px 6px #000000;
  -moz-box-shadow: 0px 0px 6px #000000;
  -o-box-shadow: 0px 0px 6px #000000;
  -htm-box-shadow: 0px 0px 6px #000000;
  -webkit-box-shadow: 0px 0px 6px #000000;
      transform: all;
-moz-transform: all;
-o-transform: all;
-htm-transform: all;
-webkit-transform: all;
transition: 1s;
-moz-transition: 1s;
-o-transition: 1s;
-htm-transition: 1s;
-webkit-transition: 1s;
}
.avatar_mess:hover
{
  margin-left: 5px;
  transform: rotate(0deg);
  -moz-transform: rotate(0deg);
  -o-transform: rotate(0deg);
  -ms-transform: rotate(0deg);
  -htm-transform: rotate(0deg);
  -webkit-transform: rotate(0deg);
      transform: all;
-moz-transform: all;
-o-transform: all;
-htm-transform: all;
-webkit-transform: all;
transition: 1s;
-moz-transition: 1s;
-o-transition: 1s;
-htm-transition: 1s;
-webkit-transition: 1s;
}
.profil_mess
{
  position: absolute;
  display: block;
  width: 190px;
  height: 310px;
  margin: auto;
  padding: 5px;
  overflow: auto;
  background: #6b664e;
  color: #c5bea0;
  font-size: 11px;
  opacity: 0;
  -moz-opacity: 0;
  -khtml-opacity: 0;
  filter: alpha(opacity=0);
      transform: all;
-moz-transform: all;
-o-transform: all;
-htm-transform: all;
-webkit-transform: all;
transition: 1s;
-moz-transition: 1s;
-o-transition: 1s;
-htm-transition: 1s;
-webkit-transition: 1s;
}
.profil_mess:hover
{
  opacity: 1;
  -moz-opacity: 1;
  -khtml-opacity: 1;
  filter: alpha(opacity=100);
      transform: all;
-moz-transform: all;
-o-transform: all;
-htm-transform: all;
-webkit-transform: all;
transition: 1s;
-moz-transition: 1s;
-o-transition: 1s;
-htm-transition: 1s;
-webkit-transition: 1s;
}
.pseudo_mess
{
  display: block;
  position: relative;
  z-index: 2;
  width: 190px;
  margin-top: -15px;
  margin-left: 10px;
  text-align: center;
  font-size: 18px;
  font-family: courier;
  font-weight: bold;
  text-shadow: 0px 0px 3px #c5bea0;
  background: #94855c;
  padding-top: 5px;
  border-left: 3px solid #371e1a;
  border-right: 3px solid #371e1a;
  border-top: 1px solid #371e1a;
  border-bottom: 1px solid #371e1a;
  box-shadow: 0px 0px 3px #000000;
  -moz-box-shadow: 0px 0px 3px #000000;
  -o-box-shadow: 0px 0px 3px #000000;
  -htm-box-shadow: 0px 0px 3px #000000;
  -webkit-box-shadow: 0px 0px 3px #000000;
}
Vous pouvez ensuite adapter les couleurs de cadre, fond ou ombre portée, la police, etc...
Si vous utilisez ce tutoriel pour votre forum, merci de mettre un crédit à Never-Utopia ! Cela ne représente pas grand chose pour vous, mais beaucoup pour nous
Dernière édition par Onyx le Sam 5 Mai 2018 - 23:25, édité 4 fois (Raison : Merci à ninouee pour la correction d'un oublie d'élément du code)

